Objectives
Learn to interface the IR sensor with Arduino UnoView digital and analog outputs of the sensor on the Serial Monitor
Things
Arduino Uno board (quantity: 1 no.)Micro USB cable A to B (quantity: 1 no.)Breadboard (quantity: 1 no.)IR sensor module (quantity: 1 no.)Jumper wire – male to male (quantity: 5 no.)Arduino IDE on your computer
Let’s begin!
An IR sensor has two bulbs on its head. The transparent one is an IR LED and the darkened one is an IR photo-diode. The LED sends a beam of IR light and the photo-diode receives reflected beams of IR light. The amount of reflected light gives an idea of the distance of an obstacle.
Most IR sensors have only a digital output. This output gives either a HIGH or LOW signal depending on whether the obstacle is close or far from a certain threshold. This threshold is set using a potentiometer present on the sensor.
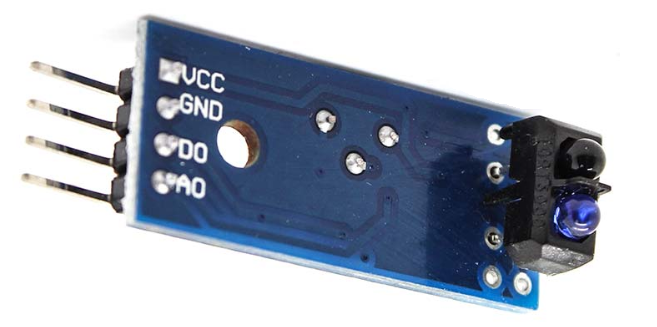
A few IR sensors also come with an additional analog output. This gives a measure of how much reflected light is actually being received by the IR photo-diode.
IR Sensor
Interfacing IR sensor module’s digital pin with Arduino Uno
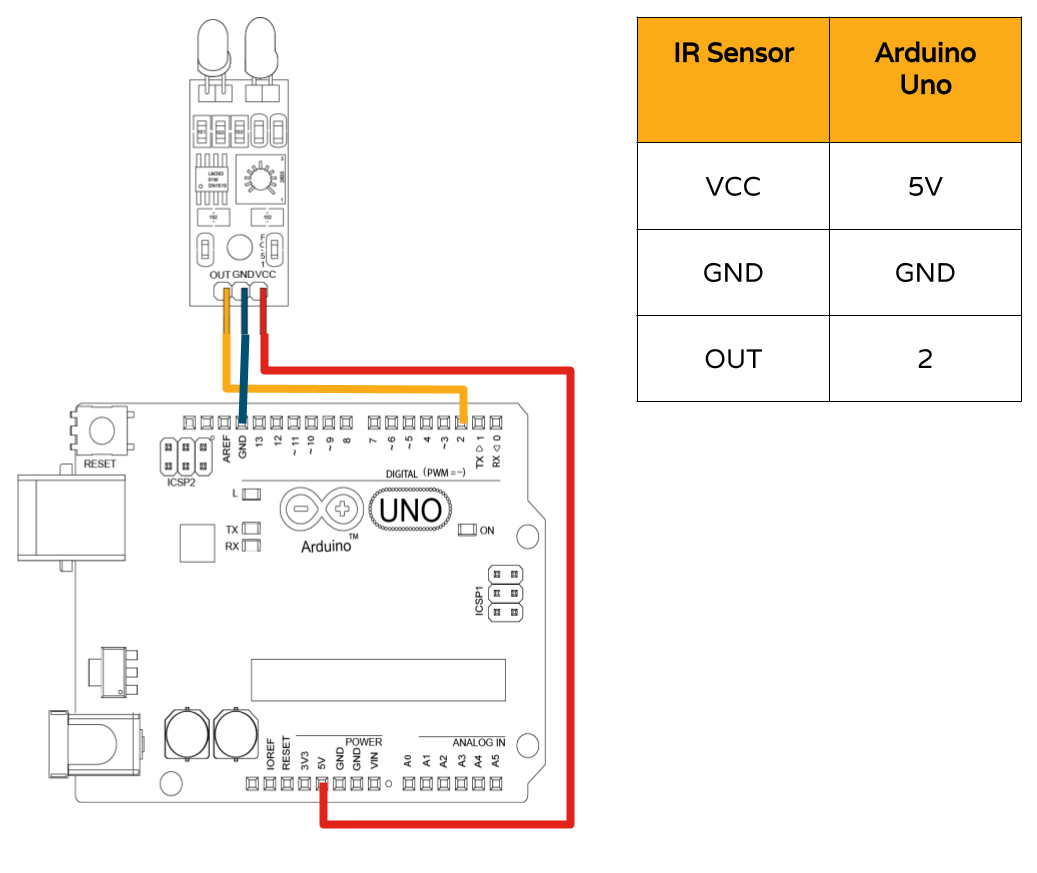 Interfacing IR sensor module’s digital pin with Arduino Uno
Final Code – Digital IR sensor
void setup() {
  pinMode(2,INPUT);
  Serial.begin(9600);
}

void loop() {
  if(digitalRead(2)==LOW){
    Serial.println("0");
  }
  else{
    Serial.println("1");
  }
  delay(100);
}
To copy the code, right click on view raw at the bottom of the code, click on open link in new tab and then copy the code.
Interfacing IR sensor module’s analog pin with Arduino Uno
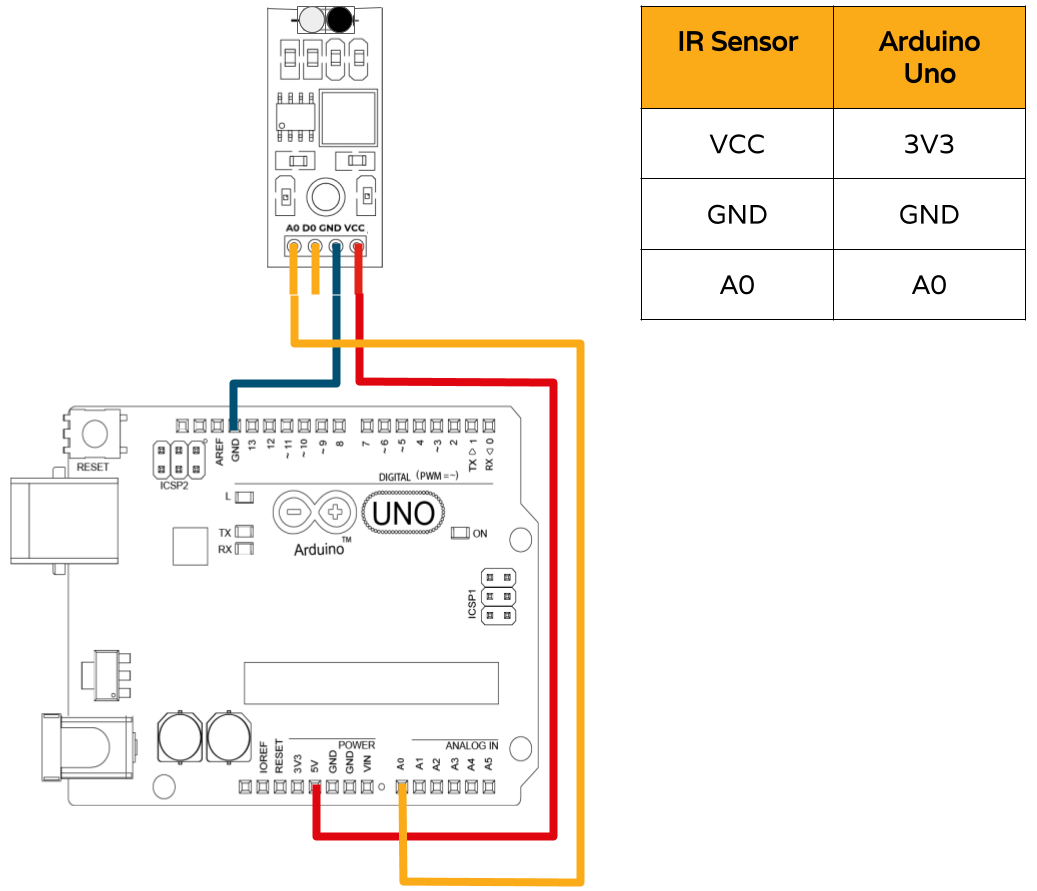 Interfacing IR sensor module’s analog pin with Arduino Uno
Final Code – Analog IR sensor
void setup() {
pinMode(A0,INPUT);
Serial.begin(9600);
}

void loop() {
Serial.println(analogRead(A0));
delay(100);
}
To copy the code, right click on view raw at the bottom of the code, click on open link in new tab and then copy the code.
There you go!
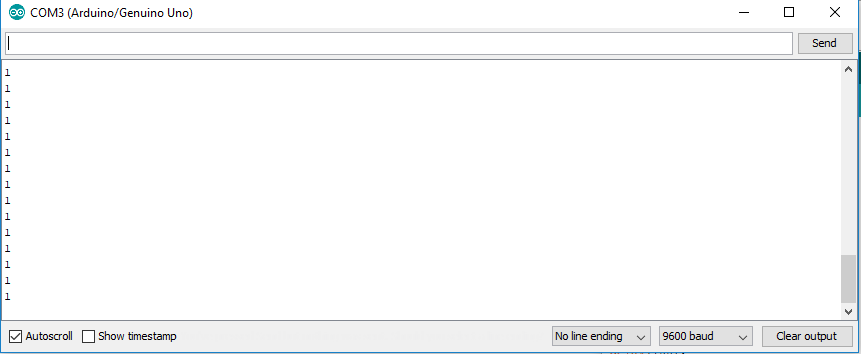
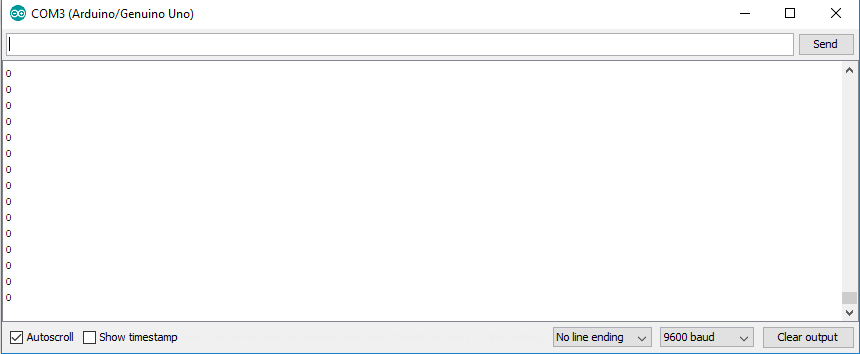
The output for the digital sensor :
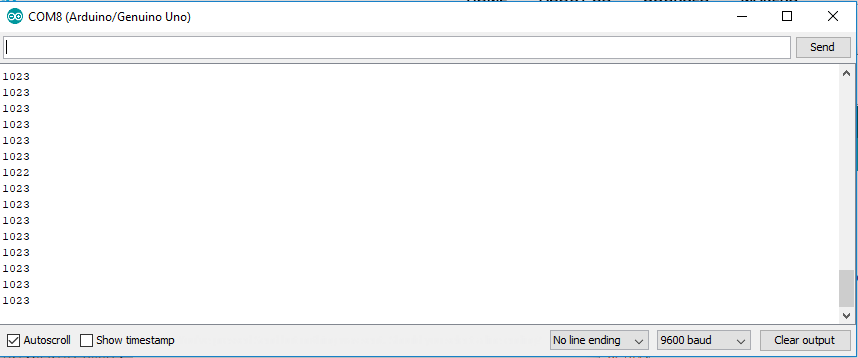
The output for the analog sensor:



No comments:
Post a Comment