Objectives
- Learn what is BLE
- Different functions of BLE
- Learn how to transmit data wirelessly through BLE
- Learn how to communicate with a mobile app through BLE
Things
- Arduino Uno board
- HM-10 Bluetooth module
- Breadboard
- LED
- 1k Resistors
- Jumper Wires
Let’s begin!
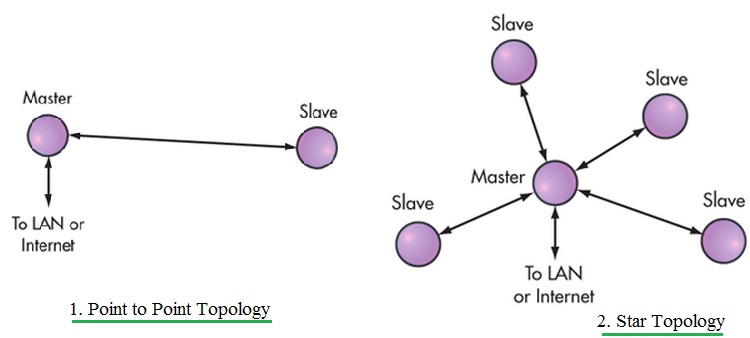
Bluetooth Low Energy or BLE is a low power, low bandwidth, and low latency data communication technology. It is a subset of the conventional Bluetooth technology and Bluetooth 4.0 is called BLE. It is also called by the name Bluetooth Smart. In a conventional Bluetooth connection is established between Bluetooth devices for communication. Once the devices are connected with Bluetooth link the connection is maintained even if there is no data to be transferred. Devices go to sleep in sniff mode and hence battery life can be enhanced. Here peak transmit current is less than 25 mA. Though this power is less, it is not low enough to run the coil cell-based applications. Bluetooth Low Energy (BLE) standard has been mainly targetted for small chunks of data transfer. The topology for BLE communication can be seen below

BLE applications
Following are the BLE applications or use cases of Bluetooth Smart/Bluetooth Low Energy/BLE technology:
• Proximity • Time
• Emergency • Network availability
• Personal User Interface • Simple remote control
• Browse over Bluetooth • Generic I/O (automation)
• Temperature Sensor • Humidity Sensor
• HVAC • Battery status
• Heart rate monitor • Physical activity monitor
• Blood glucose monitor • Cycling sensors
• Pulse Oximeter • Body thermometer
Selection Criteria
Before we begin to select the conventional Bluetooth or BLE as a mode of transmission, we must identify what type of data is to be transmitted. BLE was designed for low power and low latency. The Bluetooth specifications prior to v4.0 focused on sending large amounts of data such as audio. This causes them to have a high connection latency and high power consumption. BLE, on the other hand, sacrifices high throughput to achieve low power. So, BLE can’t be used to stream audio or music, but it’s perfect for small amounts of data sent infrequently such as sensor data. Look at the table below to try and see some of the differences between the two.

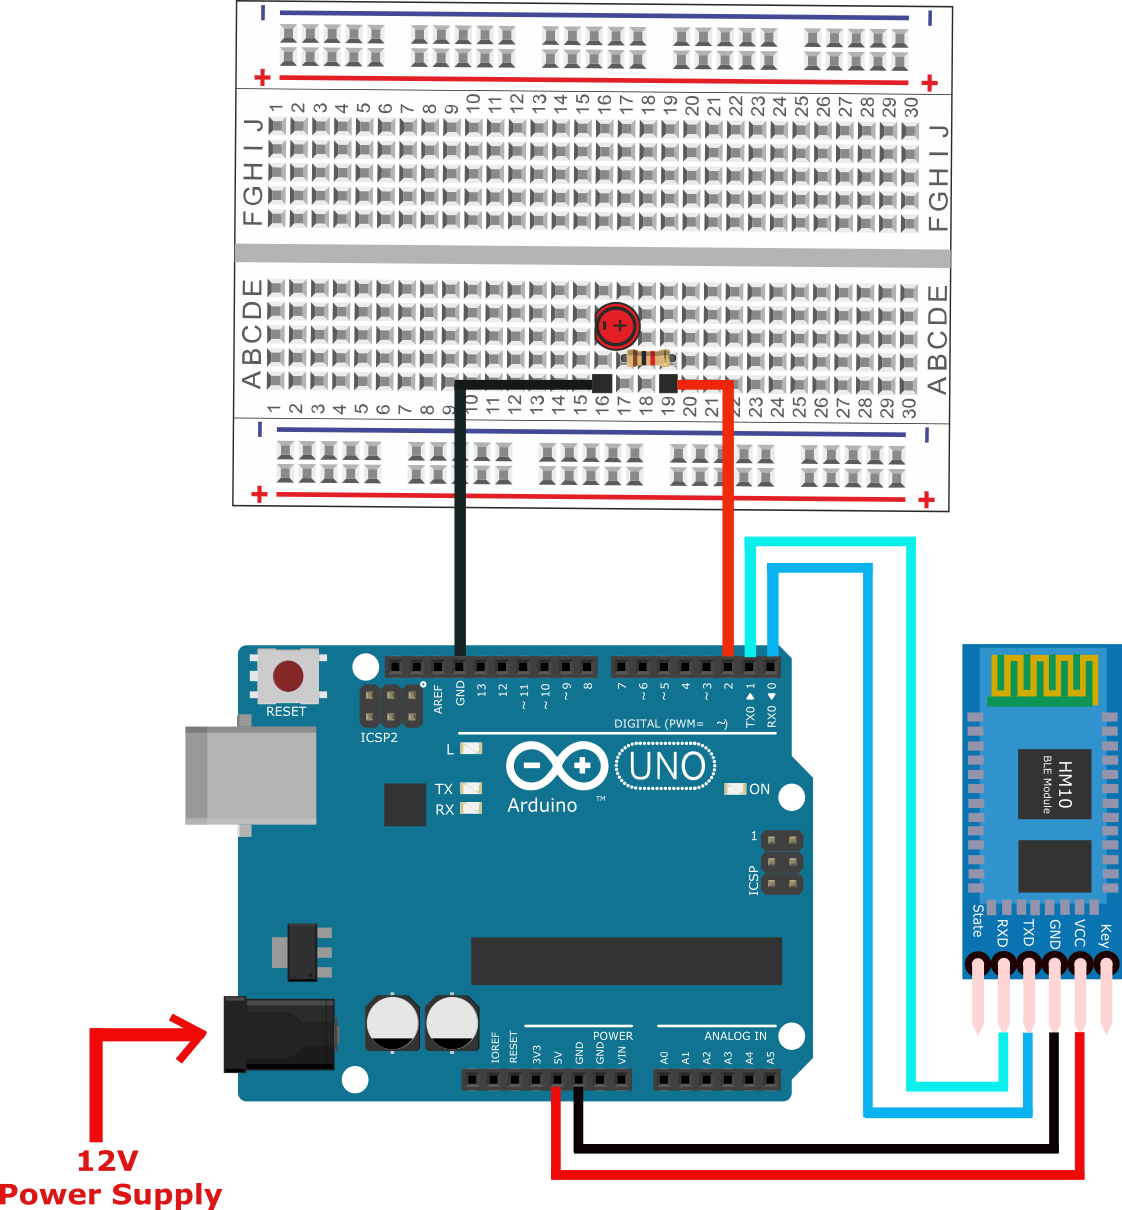
Interfacing the Arduino and HM-10
Final Code
byte LED = 2; // device to control
char BT_input=' '; // to store input character received via BT.

void setup()
{
    Serial.begin(9600); // default baud rate of module
    pinMode(LED, OUTPUT); // device to control
    while (!Serial)
    {

    }
}

void loop()
{
    if (Serial.available())
    {
        BT_input = Serial.read();
        if ( BT_input== 48) //ascii code for 0 is dec 48
        {
            digitalWrite(LED, LOW);
            Serial.println(BT_input);
            Serial.println("LED is OFF");
        }
        if ( BT_input== 49)
        {
            digitalWrite(LED, HIGH);
            Serial.println(BT_input);
            Serial.println("LED is ON"); //ascii code for 1 is dec 49
        }
    }
}
Mobile App
Download any of the Android Control App on the Play Store or the Appstore. Pair your phone with HM10. for doing this go to Settings->Bluetooth->Scan device->select MLT-BT05 and pair it. Pass code to pair is ‘123456789’.
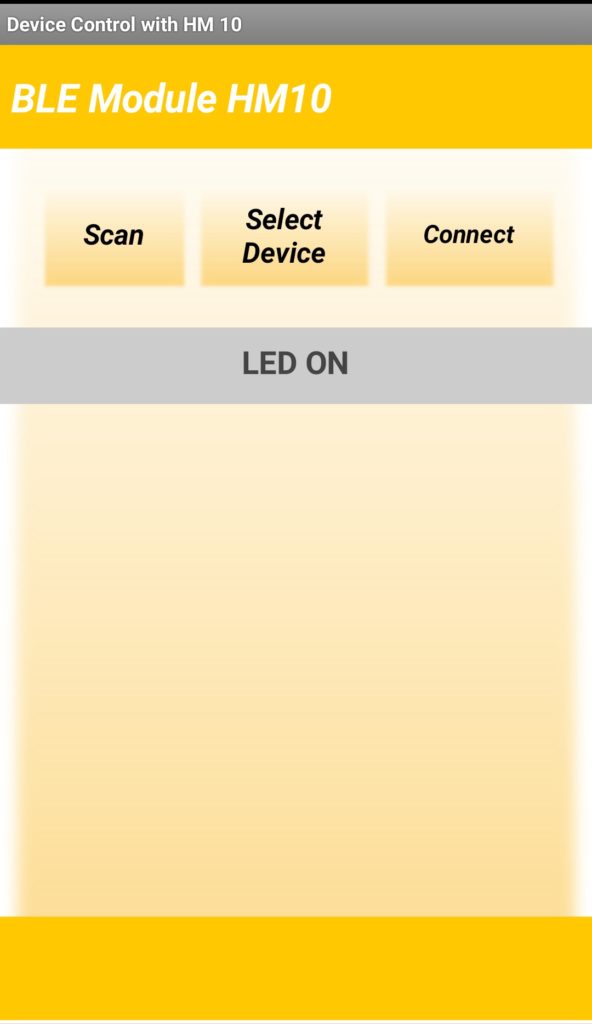
Now open the app and connect to the module. After connection, the blinking LED will remain on.
There you go!
Press on the button “LED ON” to turn on the connected LED.
This post is copied from CISCO THINGQBATOR


No comments:
Post a Comment